
What Makes DIY Lash Extensions the Future of Beauty Enhancement?
2025-10-28
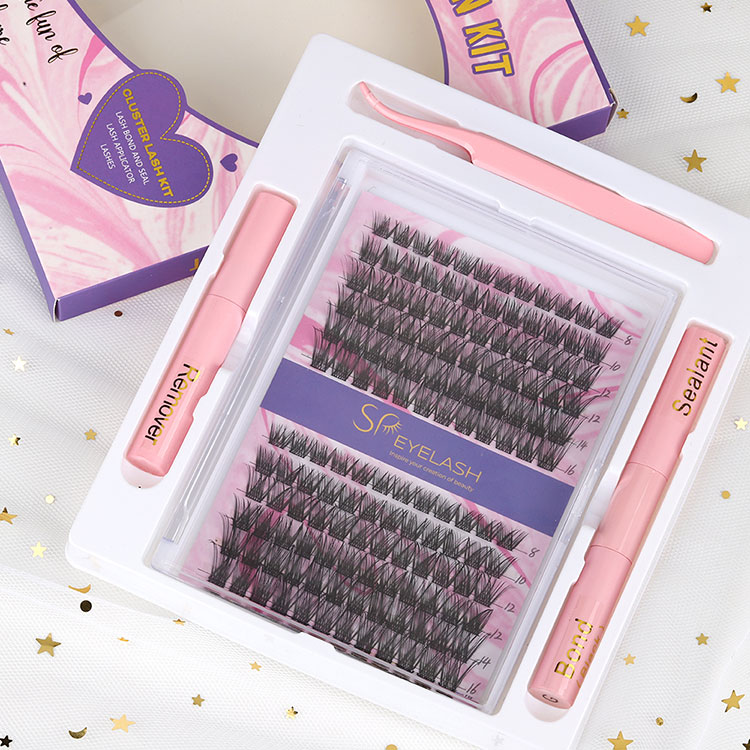
In the evolving beauty landscape, DIY Lash Extensions have become one of the most sought-after trends, redefining how individuals achieve salon-quality looks from the comfort of their homes. Unlike traditional lash extensions that require professional application, DIY lash kits empower users to apply individual or cluster lashes by themselves — saving time, money, and providing full creative control.
The concept of Do-It-Yourself lash extensions is centered around accessibility and personalization. With the right tools, users can achieve a customized look that fits their eye shape, lifestyle, and aesthetic preference. This approach has disrupted the traditional salon industry, offering flexibility without compromising on quality.
DIY lash extensions are made using ultra-lightweight fibers, often crafted from premium synthetic or silk materials, designed to mimic the natural lash curvature. The adhesive formula used in these kits is usually long-lasting yet gentle, allowing lashes to stay in place for days while maintaining a soft, natural appearance.
At the core of this beauty innovation lies a simple yet profound shift: empowerment through self-application. It’s not merely about beauty; it’s about self-expression, convenience, and cost-efficiency.
Why Are DIY Lash Extensions Becoming So Popular?
The rise in popularity of DIY lash extensions stems from multiple factors—technological innovation, social media influence, and the global shift toward at-home beauty solutions. Consumers now value products that deliver both quality and independence, and DIY lash kits fit perfectly within this mindset.
Key Benefits of DIY Lash Extensions:
| Feature | Description |
|---|---|
| Customization | Users can choose lash length, curl type, and density for a personalized look. |
| Time-Saving | Application takes under 10 minutes, compared to hours spent at salons. |
| Cost-Effective | A single DIY kit can be used multiple times, offering significant savings. |
| Lightweight Comfort | Made from soft, natural-feeling fibers that mimic real lashes. |
| Long-Lasting Hold | Designed to stay in place for up to 7 days with proper care. |
| Non-Irritating Formula | Lash adhesives are formulated to be gentle on sensitive eyes. |
| Eco-Friendly Packaging | Many brands now use sustainable, recyclable materials. |
In recent years, consumers have become more conscious of what they apply to their skin and eyes. This has pushed brands to innovate lash adhesives that are latex-free, cruelty-free, and free from harsh chemicals.
Furthermore, the rise of beauty influencers and online tutorials has demystified the lash application process. What was once a task reserved for professionals can now be done effortlessly at home with a few simple steps.
Another crucial aspect of this growth is versatility. DIY lash extensions allow wearers to transition seamlessly from natural daytime looks to bold evening styles. The flexibility to adjust lash appearance at any time is a luxury that professional lash extensions cannot always provide.
How to Apply DIY Lash Extensions Correctly
Proper application is key to achieving salon-quality results. While every brand may have specific guidelines, the following universal steps ensure flawless results and lash longevity.
Step-by-Step Application Guide:
-
Prepare the Lashes and Tools
Ensure hands are clean and lashes are free from oil or makeup residue. Use a mild cleanser or lash primer for optimal adhesion. -
Select the Right Lashes
Choose lash clusters that suit your desired style—whether natural, wispy, or dramatic. -
Apply Adhesive Properly
Apply a thin layer of adhesive to the lash band and wait 15–30 seconds until it becomes tacky. -
Placement Technique
Use precision tweezers to place the lashes underneath or above your natural lash line. Press gently to secure. -
Set and Seal
Once all clusters are applied, use a sealing solution or coat to lock in the lashes for extended wear. -
Aftercare
Avoid rubbing, oil-based products, and steam exposure for the first 24 hours. Brush lashes daily with a clean spoolie to maintain shape.
Common Mistakes to Avoid:
-
Applying too much adhesive, causing clumping.
-
Not allowing glue to become tacky before placement.
-
Skipping the sealing step, which reduces longevity.
Pro Tip: Always use a mirror angled from below to get a clear view of the lash line for accurate application.
DIY lash extensions are easy to master with a bit of patience. Once users become familiar with the process, the results can rival those achieved by professionals.
What Does the Future Hold for DIY Lash Extensions?
The future of DIY Lash Extensions isclosely tied to innovation in lash materials, adhesive technologies, and sustainability trends. As consumers demand safer and more convenient beauty options, manufacturers are responding with advancements that enhance both performance and comfort.
Emerging Trends in the DIY Lash Industry:
-
Smart Adhesive Technology: Formulas that adapt to humidity levels for consistent hold in any environment.
-
Magnetic Hybrid Lashes: Combining adhesive and magnetic technologies for quicker application.
-
Biodegradable Lash Materials: Eco-conscious options made from plant-based or silk fibers.
-
Custom Fit Lash Mapping: AI-based designs that suggest lash patterns tailored to individual eye shapes.
-
Reusable Kits: Environmentally friendly packaging and lashes that can be reused multiple times without losing quality.
With a growing preference for at-home solutions, DIY lash extensions are expected to dominate the beauty market in the coming years. Their ease of use and professional finish appeal to both first-time users and experienced makeup enthusiasts alike.
Moreover, as beauty standards evolve, so does the concept of individuality. The ability to customize one’s appearance daily aligns perfectly with the personal empowerment narrative that drives modern consumers.
Frequently Asked Questions (FAQs)
Q1: How long do DIY lash extensions typically last?
A1: When applied correctly and maintained with proper care, DIY lash extensions can last between 5 to 7 days. Longevity depends on factors such as adhesive type, aftercare routine, and individual skin conditions. For optimal results, avoid oil-based cleansers and excessive moisture during the first 24 hours after application.
Q2: Are DIY lash extensions safe for sensitive eyes?
A2: Yes, most premium DIY lash brands use hypoallergenic and latex-free adhesives that are gentle on sensitive eyes. However, it’s essential to perform a patch test before application. If any irritation occurs, discontinue use and consult a professional.
Redefining Beauty with DIY Lash Extensions
The world of beauty is shifting toward independence and creativity, and DIY Lash Extensions represent that transformation perfectly. They combine affordability, convenience, and aesthetic precision—empowering users to achieve salon-level results at home.
Brands like SP Eyelash continue to set new standards in this growing segment, focusing on safety, innovation, and natural-looking results. With advanced materials, user-friendly designs, and eco-conscious principles, SP Eyelash is at the forefront of the DIY beauty revolution.
For individuals seeking to explore this effortless approach to enhancing their natural beauty, contact us to discover how SP Eyelash can elevate your lash experience to professional perfection.